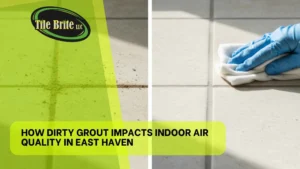
Maintaining tile surfaces in pristine condition requires more than routine mopping; it demands targeted techniques that address surface grime, restore luster, and protect grout. Whether you have ceramic, porcelain, natural stone, or vinyl tiles, following a systematic approach ensures a deep clean without damaging delicate finishes. Below are professional tile cleaning methods designed to remove embedded dirt, revitalize shine, and extend the life of your tiled floors and walls.
1. Assess Tile Type and Condition
Before beginning any cleaning regimen, identify the specific tile material:
- Ceramic and Porcelain: Dense, glazed surfaces that resist stains but can trap dirt in grout lines.
- Natural Stone (Marble, Granite, Slate): Porous materials require pH-neutral cleaners to prevent etching or discoloration.
- Vinyl or Laminate Tiles: Synthetic surfaces are vulnerable to excessive moisture; use minimal water and gentle agents.
Inspect for cracks, chips, or loose grout. Addressing repairs first prevents water infiltration under tiles, which can exacerbate grime buildup and lead to mold. By assessing condition and material, you can select appropriate cleaning products, ensuring effectiveness without compromising integrity.
2. Dry Cleaning: Sweeping and Vacuuming
Removing loose debris is the first critical step:
- Sweeping: Use a soft-bristle broom to capture surface dust, pet hair, and larger particles. Frequent sweeping prevents scratches caused by abrasive grit.
- Vacuuming: Opt for a vacuum cleaner with a hard-floor attachment (no beater bar). This captures fine dust without scattering particles into grout lines.
Regular dry cleaning minimizes surface abrasion during wet cleaning and makes deep-cleaning solutions more effective. For high-traffic areas, aim to sweep or vacuum at least twice per week to prevent dirt from embedding into the tile and grout.
3. Selecting the Right Cleaning Solution
Choosing a manufacturer-recommended or professionally formulated cleaner is essential:
- pH-Neutral Tile Cleaner: Ideal for ceramic, porcelain, and sensitive natural stone. It loosens grime without leaving residue or harming sealants.
- Alkaline-Based Degreasers: Effective for kitchen tiles with stubborn oil or grease. Apply sparingly and rinse thoroughly to avoid film buildup.
- Acidic Cleaners (Occasional Use): Muriatic or diluted phosphoric acid solutions can remove hard water stains on glazed surfaces but should never be used on natural stone; always follow label instructions and wear protective gear.
Test any new solution in an inconspicuous area to confirm compatibility. Allow the cleaner to dwell for the manufacturer-recommended time, generally 5–10 minutes, before agitation.
4. Deep Cleaning Grout Lines
Grout often darkens or discolors over time due to embedded dirt, mildew, and spills. To restore clean grout lines:
- Grout Scrubbing: Use a stiff nylon brush (not wire) and a grout-specific cleaning solution or a paste of baking soda and water. Apply the paste, allow it to sit for 10–15 minutes, and vigorously scrub in circular motions.
- Oxygenated Bleach: For stubborn stains, mix oxygenated (non-chlorine) bleach with warm water. Apply to grout, let it foam for 5 minutes, then rinse thoroughly. This method brightens grout without damaging surrounding tiles.
- Grout Steam Cleaning: A handheld steam cleaner set to medium pressure effectively penetrates grout pores, lifting grime without chemicals. Follow with a microfiber cloth to wipe away residual moisture and debris.
After cleaning, inspect the grout for crumbling or gaps. Re-grout or apply a grout sealer (see Section 8) to inhibit future staining.
5. Steam Cleaning for Porcelain and Ceramic Tiles
Steam cleaning uses high-temperature vapor to sanitize and remove deeply embedded dirt:
- Equipment Selection: Choose a steam cleaner with adjustable pressure settings and a brush attachment designed for hard surfaces.
- Procedure: Fill the machine with distilled water to prevent mineral deposits. Glide the steam head over a small area (2–3 square feet) at a time, allowing vapor to loosen grime. Immediately follow with a microfiber mop to absorb lifted dirt.
- Advantages: Steam cleaning eliminates up to 99.9% of bacteria and mold spores without harsh chemicals. It also reaches textured surfaces and embossed tile patterns where moisture and dirt accumulate.
Use steam cleaning sparingly on natural stone, as excessive heat and moisture can affect sealers. Always dry the surface completely to prevent water spots or rapid reabsorption of grime.
6. Natural DIY Solutions: Baking Soda and Vinegar
For eco-friendly, budget-conscious cleaning, combine household staples:
- Baking Soda Paste: Mix one part water with three parts baking soda to form a thick paste. Apply over tiles and grout, especially in high-stain areas (kitchen backsplashes, bathroom floors). Let it sit 10–15 minutes, then scrub with a soft brush. Rinse thoroughly.
- Vinegar Dilution: In a spray bottle, combine equal parts white vinegar and warm water. Mist onto ceramic or porcelain tile surfaces; never use vinegar on marble, limestone, or travertine. Wipe with a microfiber cloth, applying light pressure to remove soap scum, mineral deposits, and mildew.
- Essential Oils (Optional): Add a few drops of tea tree or lavender oil to the vinegar solution for antibacterial benefits and a fresh scent.
These DIY remedies work best for maintenance cleaning rather than heavily soiled or sealed natural stone surfaces. Always test on a small patch to ensure no adverse reactions.
7. Polishing and Restoring Shine
Once tiles are clean, enhancing their luster elevates overall appearance:
- Tile Glaze Restoration: For glazed ceramic and porcelain, apply a thin layer of stone polishing compound or tile polish using a low-speed buffer with a soft pad. Work in overlapping, circular motions. Buff until the surface reflects light evenly.
- Stone-Specific Polishes: Natural stone tiles (marble, granite) require a solvent-based or water-based stone polish designed to fill minor scratches and deepen color. Apply per product instructions, typically allowing to dry and buffing to a soft sheen.
- Microfiber Dry Buffing: Even without specialized products, using a dry, clean microfiber cloth to buff tiles after cleaning removes streaks and highlights gloss. Focus on small sections (2×2 feet) to ensure uniform shine.
Avoid wax-based polishes on ceramic or porcelain tiles; they can yellow over time and attract dirt. Instead, select products labeled “non-slip” for floor tiles to maintain traction.
8. Preventive Maintenance and Sealing
Maintaining a protective barrier extends cleanliness and guards against stains:
- Grout Sealing: After grout is fully dry (usually 48–72 hours post-cleaning), apply a penetrating grout sealer. Use a small brush to coat grout lines, allowing it to absorb for the specified time (often 5–10 minutes), then wipe excess. Re-seal annually or as recommended.
- Tile Sealing (Natural Stone): Porous stones like slate or unglazed travertine benefit from a penetrating stone sealer. Apply with a low-lint cloth, ensuring complete coverage. Let cure per manufacturer guidelines before light foot traffic resumes.
- Routine Maintenance: Implement a weekly schedule, dry cleaning, spot mopping with a pH-neutral cleaner, and monthly grout spot checks. Address spills immediately (especially acidic substances like wine or citrus) to prevent permanent etching or discoloration. Use entry mats in high-traffic areas to reduce abrasive grit.
Consistent upkeep prevents grime accumulation, reducing the need for intensive deep cleans and preserving the restorative efforts.
Conclusion
Professional tile cleaning techniques require careful evaluation of tile material, thorough debris removal, targeted grout cleaning, and application of appropriate cleaning agents. Incorporating steam cleaning and natural solutions can enhance results, while polishing and sealing safeguard against future wear. By following this systematic approach, combined with a consistent maintenance regimen, you’ll restore tile surfaces to their original shine, eliminate stubborn grime, and ensure longevity of both tile and grout. Invest time and the right products to transform dull, soiled tile into a gleaming, hygienic environment that elevates any space.
